The Historicon Battle
This re-fight of the first day of Operation Epsom occurred at Historicon in Lancaster, PA on July 26, 2002. Twelve players pushed 900 15mm infantry figures and over 150 tanks and guns in this wargame depicting the attack of 15th Scottish and 11th Armoured Divisions on elements of the 12th SS “Hitlerjugend” Panzer Division holding positions to the west of Caen.
The British team plotted all their movement orders, arrival phases, and pre-game artillery bombardments while the German players allocated their Kampfgruppen. The British were tasked with clearing two routes from their entry points across the table to the Southern (German) edge. After the British team finished with their planning, they left the room while the German players deployed their troops and fortification pieces on the board.
When the British team returned, they noted with dismay the presence of two heavily fortified hilltop positions to the rear of the board between St. Manvieu and Cheux…right where they had planned their initial attack. A belt of minefields and wire entanglements sealed the gap between the two villages. Luckily, British HQ had planned a pre-game bombardment upon the area with the obstacles, using the guns of two cruisers (HMS Norfolk and Suffolk), the artillery of VIII Corps, and 8th AGRA Army Group guns. This bombardment proved largely ineffective, since the Germans had deployed their infantry in positions to the rear. A few minefields were cleared, however, by the huge guns of the AGRA and Royal Navy.
The initial turn saw the deployment of two British infantry brigades from the 15th Scottish, supported by Churchill tanks from the 31st Army Tank Brigade. Divisional artillery laid smoke in front of the nearer hill position to block observation. The left brigade (the KOSB) attacked a small hamlet suspected of sheltering enemy artillery observers. The suspicion was correct as heavy corps-level artillery fire destroyed a company of the infantry and the German defenders drove the attackers out of the hamlet with grenades and small-arms fire. [Turn3]
Two hours into the battle found the first anti-tank shot as German guns fired from the outskirts of Cheux, suppressing a platoon of Churchill tanks. An AGRA mission plotted to land on the main German hill position proves very timely when four heavy batteries hit and eliminate the emplacement of the German artillery observer. More smoke is called in to screen the anti-tank gun’s position in Cheux. [Turn4]
Thirty minutes later, the 6th KOSB breaks when losses mount from another unsuccessful attack on the hamlet and a deadly stonk of artillery catches them in the open. The Germans now change orders for their troops closer to Rauray, ordering them to march to a position to the rear of their main hilltop position. The hamlet was to hold out for ninety more minutes until the “funnies” from the tank brigade were added for the assault. Unfortunately for the 2nd Glasgows, a sheaf of Nebelwerfers landed astride their positions, killing two platoons and the battalion Headquarters. [Turn6]. Another Britsh brigade now enters the fray, and heads right for Cheux. British friendly fire destroyed a Recce Dingo scout car as it motored down the road toward the German heights, but the Royal Navy guns silenced the large bunker again. [Turn9].The rainy skies parted just long enough for the RAF to make a welcome appearance overhead. [Turn10] A Typhoon brings quick destruction to a Mark IV tank dug in just to the north of the large bunker. Now alerted, the Germans were hurrying to move some FLAK guns to the area. The RAF was sure to get a warm greeting on the next mission!
An attack was now hurled on the smaller bunker complex [Turn 11], led by Churchill tanks. The infantry hoped that the heavy armor of the tanks would help them take the hill, but well-hidden German infantry accounts for two tank platoons with their panzerfausten. Thirty minutes later [Turn 12], the lead brigade of the 11th Armoured Division motors onto the board on the road through Cheux, hoping that the 7th Seaforths can continue their advance against stiff opposition from the German engineers holding Cheux. Radio traffic indicated that some of their platoons has even captured a sector of the village adjacent to the road, and were holding on. Another flight of Typhoons arrive, but were driven off by heavy ground fire, which now included quad-barreled flak guns. The amazing Seaforths take two more sectors in the next half-hour [Turn13] and even eliminate the artillery spotter for the German 105’s which had harassed them earlier.
More Typhoons arrive with no more success than the last flight [Turn14]. The tanks continue to assault the near position, even flattening a PaK 40 under their treads. The heavy attacks prove too much for the “Hitlerjugend” defenders [I/26th Panzergrenadiers], who break and stream away from the combat. The right flank of the Germans is now broken, and one route off the board seems assured!
A half-hour later, Cheux is attacked from the east, but a company attack against an entrenched PaK 40 is eliminated by German Corps guns. More Typhoons circle overhead, driven off by flak. Half of Cheux is now in British hands and the German engineer’s strength is being steadily eroded.
The game was called at this point. 15 turns were played, and the referees and players awarded the win to the British. The attacks of the 5 circling Typhoons were made, resulting in 3 more KO’d Mark IV tanks, and the British on their left successfully changed their orders and were to sweep to the rear of the large bunker. The defending Germans were weakened to the point that the heavy British pressure would undoubtedly achieve the needed routes off the battlefield.
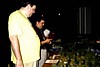
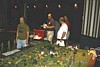
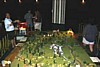
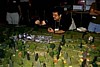
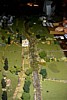
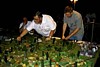
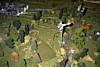
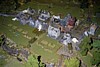
Battle Photos
Click on the thumbnails below for a larger picture
and comments.
hist02_1.jpg (6 KB)
hist02_2.jpg (7 KB)
hist02_3.jpg (8 KB)
hist02_4.jpg (8 KB)
hist02_5.jpg (12 KB)
hist02_6.jpg (8 KB)
hist02_7.jpg (8 KB)
hist02_8.jpg (9 KB)
hist02_9.jpg (16 KB)
TOP
Back